Hack the Crab at RustFest

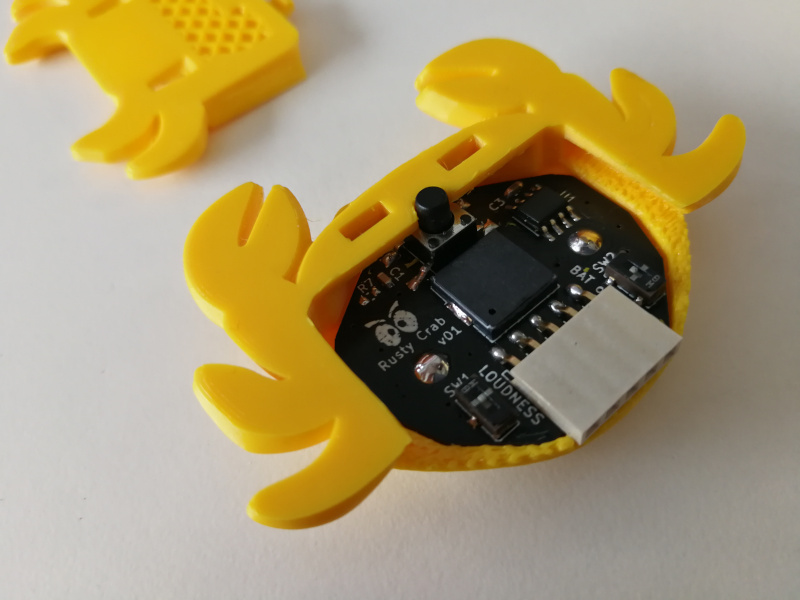
Say hello to this cute little crab, which can make simple beeping noises and blink
the eyes! In other words, it is a simple hello-world project to test a tiny stm32g030 MCU.
If you want to check out this MCU (and make the crab do something), it will be available in RustFest 2019 Impl days. Just search for a table with crabs.
The crab might be interesting for you for other reason than crabby-looks. The MCU inside is very energy efficient, compact, and only needs one external component to work. It is also 32-bit, it is arm-v6, and you can upload your code as usual (except a few caveats that will be solved with time, discussed later). Perfect for a project that needs a simple, efficient MCU.
This post therefore is a guide of how to upload your code to this crab. You can also consider the crab as a distraction, because it is the same as uploading your code to this MCU would be without the whole crab idea attached to it. The making-off crab blog post will (hopefully) come later.
The hardware
Inside the crab, there is the PCB.
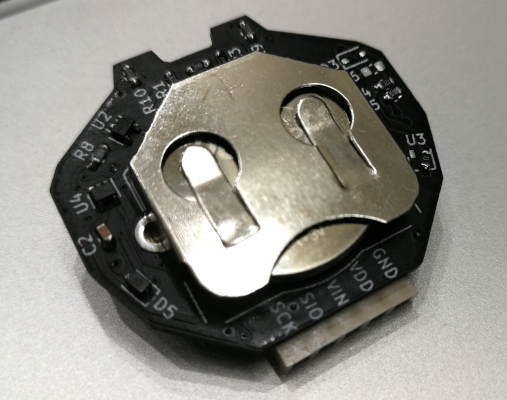
On the bottom of PCB has a battery cell holder, that houses a popular 2032 battery cell:
Here is the top of the PCB, with all of the various parts named:
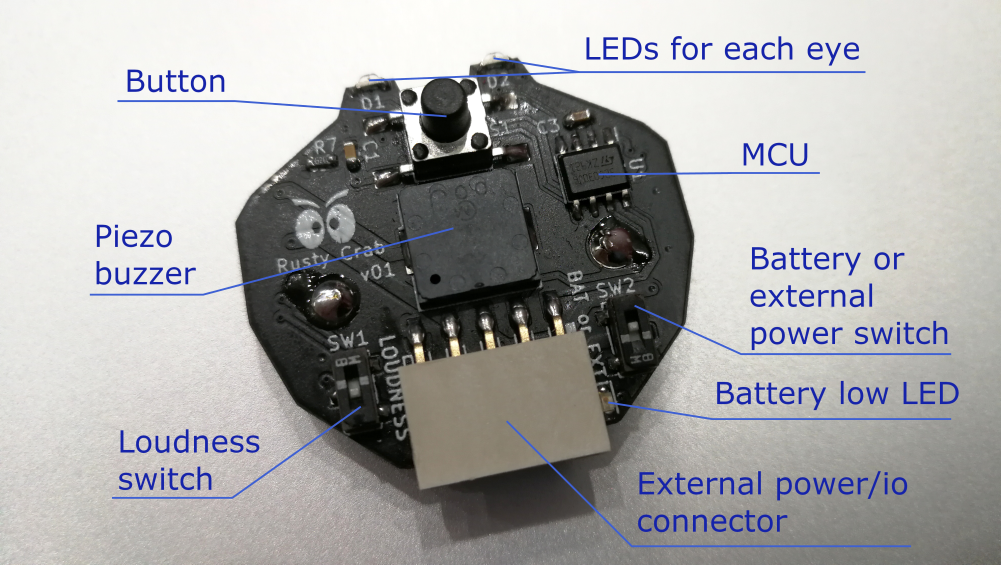
The exact model of the MCU is STM32G030J6M. It is a fairly new, energy-efficient, 32-bit
MCU. As you can see, it only has 8 pins.
Pins are configurable for this device, the same pin can be used for different ports (all possibilities are listed in the device datasheet).
| Pin | Connected function |
|---|---|
| 1 | Piezo buzzer |
| 2 | VCC (2V - 3.3V) |
| 3 | GND |
| 4 | Button (with external pull-down resistor, so it is active-high) |
| 5 | Left eye LED (active-high) |
| 6 | Right eye LED (active-high) |
| 7 | Programmer SWD data line |
| 8 | Programmer SWD clock |
Power switch can switch crab to external power (or to disconnect battery to avoid draining it).
The low-battery indicator will light up when the voltage falls bellow 2.1V.
The loudness switch changes piezo buzzer resistor to higher one, to make crab silent and less annoying.
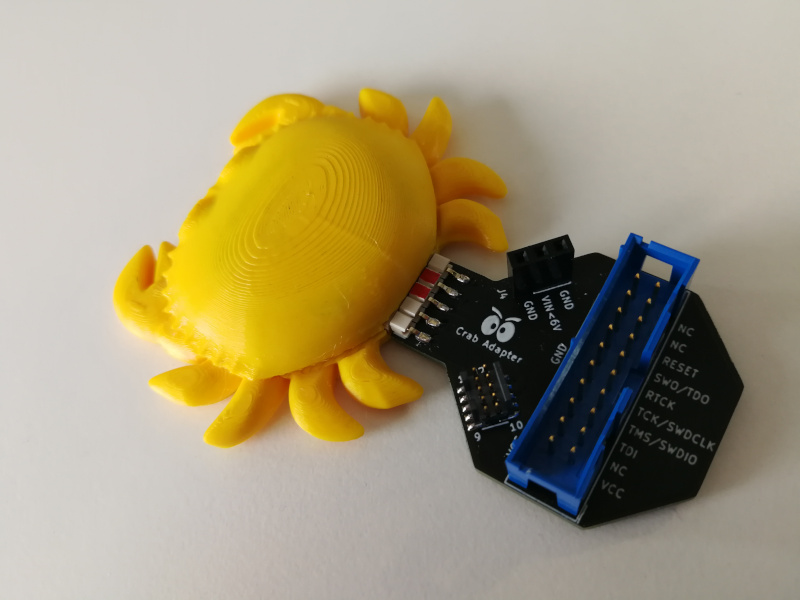
And lastly, there is the external connector, which exposes programming pins (7, 8), internal voltage and ground to programmer, and can optionally power the crab when the power switch is at EXT position.
The external adapter can be used to connect the crab to ST-Link V2/V3 programmer.
The software
If you’ve done any previous embedded Rust development, you may already have the necessary tools. If not, you can find the relevant instructions here.
However, we will need to use my custom fork of OpenOCD instead of official version. I have prepared a binary release for Windows and MacOS, and a README.md contains instructions to build it from source (for linux and other reasons).
Why do we need this?
The MCU itself is very recent, so the OpenOCD master branch does not yet have support for it. However, the code necessary to flash this family of chips was merged into sysporgs’ fork of OpenOCD. I have forked their version and added the necessary modifications to make it buildable with autotools again (it appears that sysprogs are sung CMake), and a necessary fix to support this exact device.
With all that done, all that is necessary is to:
1. Connect the wires
- Connect STLink V2/V3 programmer to the adapter over the USB
- Connect the adapter to crab
2. Start OpenOCD
openocd -f interface/stlink.cfg -f target/stm32g03x.cfg
3. Upload and run
Upload the same way like you would do for other embedded projects (covered in embedded book).
I have prepared an example “hello-world” project to use as a start point here. It is very basic and does not even use HAL.
The example project starts a loop that is waiting for a button press. Once it detects a button press, it turns on the LEDs, sends the beep, and then turns off the LEDs.
The software, 2020 update
Thanks to Vitaly Domnikov (@dotcypress), the crab can now play old nokia tunes!
Clone the firmware from here.
Install cargo flash (a probe-rs project):
cargo install cargo-flash
With your ST-Link probe attached to the crab, run
cargo flash --chip stm32g030J6Mx --release
No need for OpenOCD!